A compass navigation guide is an essential material as navigating with a compass has become a fundamental skill used in outdoor exploration by explorers such as navigators, sailors, hikers, and trekkers. Unlike GPS devices, a compass does not depend on batteries, the internet, signals, or modern technologies. It simply works by depending on Earth’s magnetic field making it a timeless and independent navigation tool. This is a complete compass navigation guide that provides a step-by-step explanation for beginners on how to navigate with a compass. It also covers the history, components, functionality, techniques, and practical application of compass navigation. To learn more about how to use compass and maps you can explore the Boy Scouts of America Official Site.

Table of Contents
The History of compass Navigation
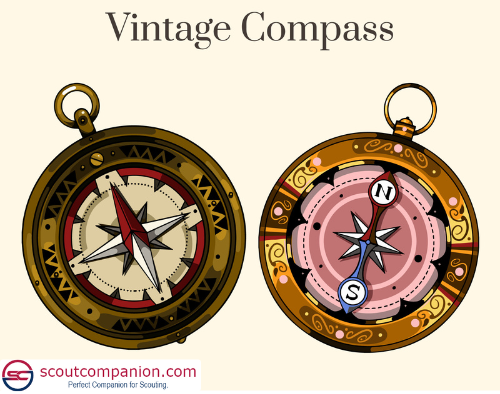
The compass is a navigation device that indicates cardinal directions such as “North, East, West, and South” while navigating across geographic locations. This compass has a long history dating back thousands of years. It was first invented by the Chinese during the Han Dynasty (206 BCE — 220 BCE). At that time these compasses were not particularly designed for navigation purposes but for a practice linked to “Feng Shui” and spiritual alignments. These compasses were made of lodestone, which is a mineral containing natural magnetic property that aligns with the Earth’s magnetic field.
Later on, in the 11th century, Chinese sailors started using the compass for navigation at sea, resulting in marine exploration. This technology spread to other parts of the world, specifically Europe through sea trading. Later by the 13th century European traders and sailors used this technology which led to a great revolution in the age of exploration. Particularly, notable sailors named Christopher Columbus and Vasco da Gama used this device to figure out unknown waters and lands.
The ancient design of the compass remained the same over centuries. Today, while GPS devices dominate, the compass remains a crucial tool for explorers, especially in remote areas.
The Science Behind Compass Functionality
The compass is designed in such a way where its needle should align along with the Earth’s magnetic field, which is generated by the movement of molten iron in Earth’s core. This magnetic field extends outward, creating the two poles namely North and South. A compass needle, made of magnetized material, naturally aligns with these poles, providing a specific direction.
Understanding the Components of a Compass
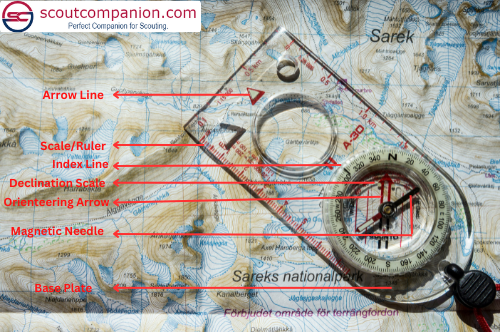
As a beginner, it is important to understand the components of a compass. A compass is composed of several parts that work together to help you find your direction.
- Base plate: A Base plate is a flat and transparent platform that acts as the foundation of the compass. It contains rulers or scales for measuring the distances on the maps.
- Magnetic Needle: It is a lightweight, magnetized needle that freely rotates over the magnetic plate and aligns with Earth’s magnetic field. The red-tipped end of the magnetic needle points to the magnetic north.
- Compass Housing: It is a circular, rotating capsule that binds over the magnetic needle. Where the housing is marked with degree measurements (0–360°).
- Orienting Lines and Arrow: The orienting lines are marked within the compass housing and help align the compass with a map. The orienting arrow holds the needle in place during navigation.
- Direction of Travel Arrow: It is an arrow on the base plate that points toward your intended direction once the compass is set.
- Index Line: It is a fixed line on the compass housing used to read the degree of your bearing.
These components work together by showing precise navigation results. Now let’s dive into the step-by-step explanation on how to use a compass through our compass navigation guide
A Step-by-Step Compass Navigation Guide
Following are the six important steps that are mentioned in this compass navigation guide that ensures the readers to learn navigation using a compass and a map.
- Calibrating your compass
- Orienting with the compass
- Orienteering compass and map
- Navigating using a bearing
- Practical field navigation
- Retracing your steps with a compass
Step 1: Calibrating your Compass
Calibrating your compass, the first step of compass navigation guide is the process of finding the precise direction where the compass needle is pointing and also making required adjustments so that the compass gives accurate reading. The vital significance of calibration is to maintain accuracy and standardization,
But understanding these magnetic declination is critical when tried to obtain accurate value. Because the magnetic north where the compass needle points to is different from the real geographic north pole in the Earth. The angle between these two points is called the magnetic declination and varies depending on our current location.
Below are the two steps that needed to be considered while calibrating a compass:
- Determine Magnetic Declination: To find the accurate declination value for your current location, refer to a topographic map, online tools, or a declination chart.
- Adjust for Declination: In shortage of precise reading, we can adjust the screw that is fixed in the compass for declination adjustment. But this feature is added only to the modern compasses. For compasses without these features, We need to manually add or subtract the declination value from the bearing.
Step 2: Orienting with the Compass
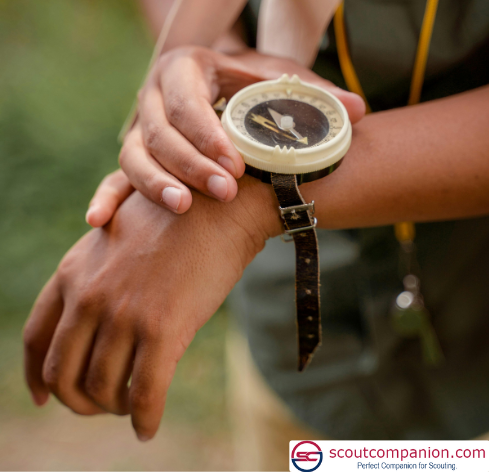
Before combining the compass and the map, you need to orient yourself with the compass to know your direction when you are outdoors. This step in compass navigation guide will help you to plan your direction and use a compass effectively.
The following are the steps to be followed as part of compass navigation guide while orienting with the compass:
- Holding the Compass: Hold the compass flat in your hand and make sure it stays leveled and not moving.
- Avoid Magnets and Electronics: Magnetic fields from magnetic and electronic devices can interrupt the rotation of the compass needle resulting in inaccurate readings. Minerals like magnetite deposited in the rocks can also disrupt the needle’s rotation. So, standing near iron-deposited rocks should be avoided while using a compass.
- Reading the Direction: Now the fixed arrow on the base plate of the compass will show the direction you should move further.
Step 3: Orienteering Compass and Map
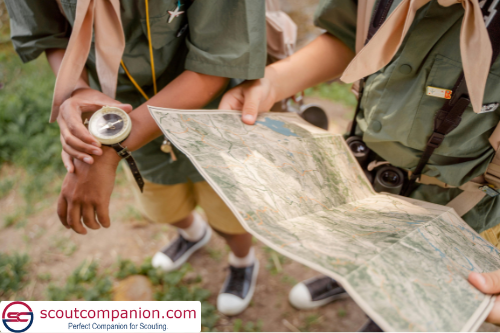
Orienteering with the compass, an important step in compass navigation guide, means navigating with a compass and a map. It is also said to be a “thinking sport”. Because it involves both map reading and decision-making while walking to a desired location. The following steps will explain how to orient a compass and a map.
- Orient the Map: Place the compass on top of the map until the compass needle aligns with the Earth’s North Pole’s Grid lines. Also make sure the compass needle’s red end should point the north.
- Mark your Route: Mark your current location and draw a line on the map between the starting and ending points of your route.
- Set your Bearing: Place the edge of the compass along the route line. Rotate your compass until the orienting arrow aligns with the map’s North-south Grid.
- Account for Declination: If required, adjust the declination screw as explained earlier.
- Follow the Bearing: Hold your compass steady and turn your body until the compass needle aligns with the orienting arrow. The direction of the travel arrow on the base plate of the compass will point the route for your destination.
Step 4: Navigating using a Bearing

Navigating using a bearing means using the reading obtained from the compass and marking it on the map to plot the route for traveling. A bearing is a value, used to find direction that is obtained from the compass which is basically measured in degrees(360 degrees) representing a full circle.
The compass navigation guide provides a step-by-step explanation on how to use a bearing value:
- Understand the bearing value: As we know the bearing value is always measured in degrees, specially 360 degrees, it is necessary to know which degree indicates which direction. For example,
- 90o points East
- 135o points Southeast
- 270o points West
- Set the Bearing on the Compass: Now the next step is called “putting red in the shed” where you need to rotate the compass housing until the bearing value aligns with the index line of the compass. Now rotate yourself(not the compass housing) until the red magnetic needle aligns with the orienting arrow inside the compass.
- Move towards the Bearing: Now the direction of the travel arrow will point to the exact direction where you need to travel. Look into the direction of the arrow and fix a landmark in that direction. While traveling check the compass needle periodically to ensure the needle stays aligned with the orienting line.
Step 5: Practical Field Navigation
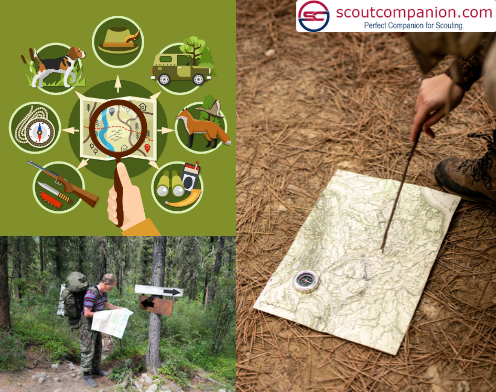
In the field outdoor conditions are unpredictable. Trails can disappear, landmarks may be obscured, and obstacles like rivers, cliffs, or dense vegetation can block your path. But practical field navigation teaches you to overcome those blocks in the path and challenging situations.
The following are some of the tips provided in our compass navigation guide to apply practical field navigation:
- Identify Landmarks: Before starting your navigation journey look around your location for natural landmarks like mountains, hills, unique trees and man-made landmarks like direction boards, buildings, and trails. Use these landmarks as visual checkpoints along your path.
- Reassess Bearings Regularly: While traveling pause for every 10-15 minutes and check whether the compass needle aligns with the travel arrow. This helps you to stay on the accurate path even if you don’t have landmarks to plot.
- Handle obstacles: If obstacles like rivers, cliffs, or thick vegetation block your path, take a detour around the obstacle by creating a temporary bearing that moves you to the safe side. Once you move past the obstacles, return to your original bearing and continue your travel.
- Use Sun and Shadow and Guide: Use the natural cues with compass navigation. For example, the sun rises in the East and sets in the West helps to determine the direction where shadows can help you to calculate the time.
Step 6: Retracing your Steps with a Compass
This step explains how you can use your compass to travel back to your starting point after reaching your destination by following the same route backwards. Instead of choosing a new route to travel back to your starting point, choosing the same route will smooth your journey by reducing challenges as you already know the blocks in the path and how to move past them. To retrace your path you need to reverse your bearing using the following the steps in our compass navigation guide:
- Determine the Back Bearing: A back bearing is the opposite direction of your original bearing. Do the following to calculate it:
- If your bearing is less than 180o, add 180o(Eg: 100o will become 280o).
- If your bearing is more than 180°, subtract 180°(Eg: 200o will become 20o).
- Set the Back Bearing on the Compass: Rotate the compass housing until the back bearing aligns with the index line. Keep the compass steady and leveled. Turn yourself until the compass needle aligns with the orienting arrow inside the compass housing. The direction of travel arrow on the base plate will point the direction you need to travel.
- Move towards the Bearing: Start traveling in the direction of the travel arrow and look for landmarks in that direction. While traveling check the compass needle periodically to ensure the needle stays aligned with the orienting arrow. If you encounter any obstacles you bypassed earlier, use temporary detours as you did last time while traveling towards the destination.
Compass Navigation Guide Practical Exercises for Beginners

Since navigation is an outdoor activity, it requires more practical experience than knowledge. Practical experience and confidence can only be built with compass navigation practice. Beginners can try the following activities that are suggested in the compass navigation guide to gain navigation experience.
- Navigate a Simple Route: In an open area like a park, set a bearing to a visible landmark and walk toward it. Practice adjusting for detours, declination, setting back bearing, and returning to your starting point.
- Map Drills: Use a detailed map of your local area. Plot a specific location and practice aligning the map with your compass and determining the bearing values.
- Orienteering: Participate in orienteering, a sport that combines navigation and physical fitness. It’s a great way to test your skills in real-world conditions.
Conclusion
Learning to navigate with a compass is a rewarding and empowering skill. By understanding its history, components, functionality, and techniques, through this compass navigation guide beginners can develop confidence in their ability to navigate in any environment. Whether used along with a map or as a standalone tool, the compass remains an indispensable companion for explorers. With practice and dedication, anyone can master this surviving art, ensuring safe and successful journeys in the great outdoors. You can also find our guide on The Ultimate Guide to Packing for a Scout Camp.


